Cellar Conversion Ideas
If you are done using your basement as a dump – somewhere to throw everything you don’t find useful in the house – but you don’t have the heart to throw your stuff away, converting your basement into a usable space is ideal.
If you’ve decided you want to turn your property’s basement into a useful space, which not only makes it more functional but also adds value to your home, we have nine ideas for basement conversions that can’t fail to impress.
Read on to discover the best cellar conversion ideas, and to learn how to maximise your underground space.
1. Gym
If you’re a fitness fanatic or just hate going to the gym every day, then why not bring the gym to your home? With a basement gym, you’ll save thousands on gym membership every year.
Moreover you won’t worry about hygiene, as you won’t need to share your equipment with others. There are tons of benefits to having a home gym, including working out at your own pace without worrying about scheduled gym timings.
The best thing about converting your basement to a gym is that you won’t have to invest too much money for the conversion. You have the option of either starting with a complete gym set or just a few essential pieces of equipment.
2. Music Studio
A basement is a perfect place for a music studio, because it is easier to soundproof a basement than other parts of a house.
This is especially true if you have a high ceiling, allowing for wonderful acoustics. A basement studio allows you to disconnect from the world and focus entirely on creating musical masterpieces. You can play instruments for as long as you like without annoying the neighbours!
3. Cinema
If you want the perfect cinematic feel at home, converting your basement into a cinema is a fantastic idea.
If your basement doesn’t let in much light, then converting it into a cinema would be an ideal option, because you wouldn’t have to pay extra money for lightproofing your cinema.
With your own basement cinema, you can invite friends over and enjoy cinematic surround sound and high-resolution 4K display at home at any time of the day, and on any day of the week.
4. Underground Parking
Parking is always a plus! It’s not only the ultimate solution to the limited parking space in front of your house, but it also adds value to the property. If you are worried about having limited space in your basement, you can extend parking space by a double-tier lift, and park two vehicles in the same place instead of a single vehicle.
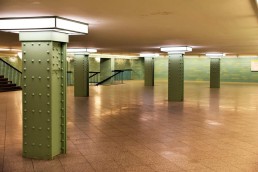
5. Bedrooms
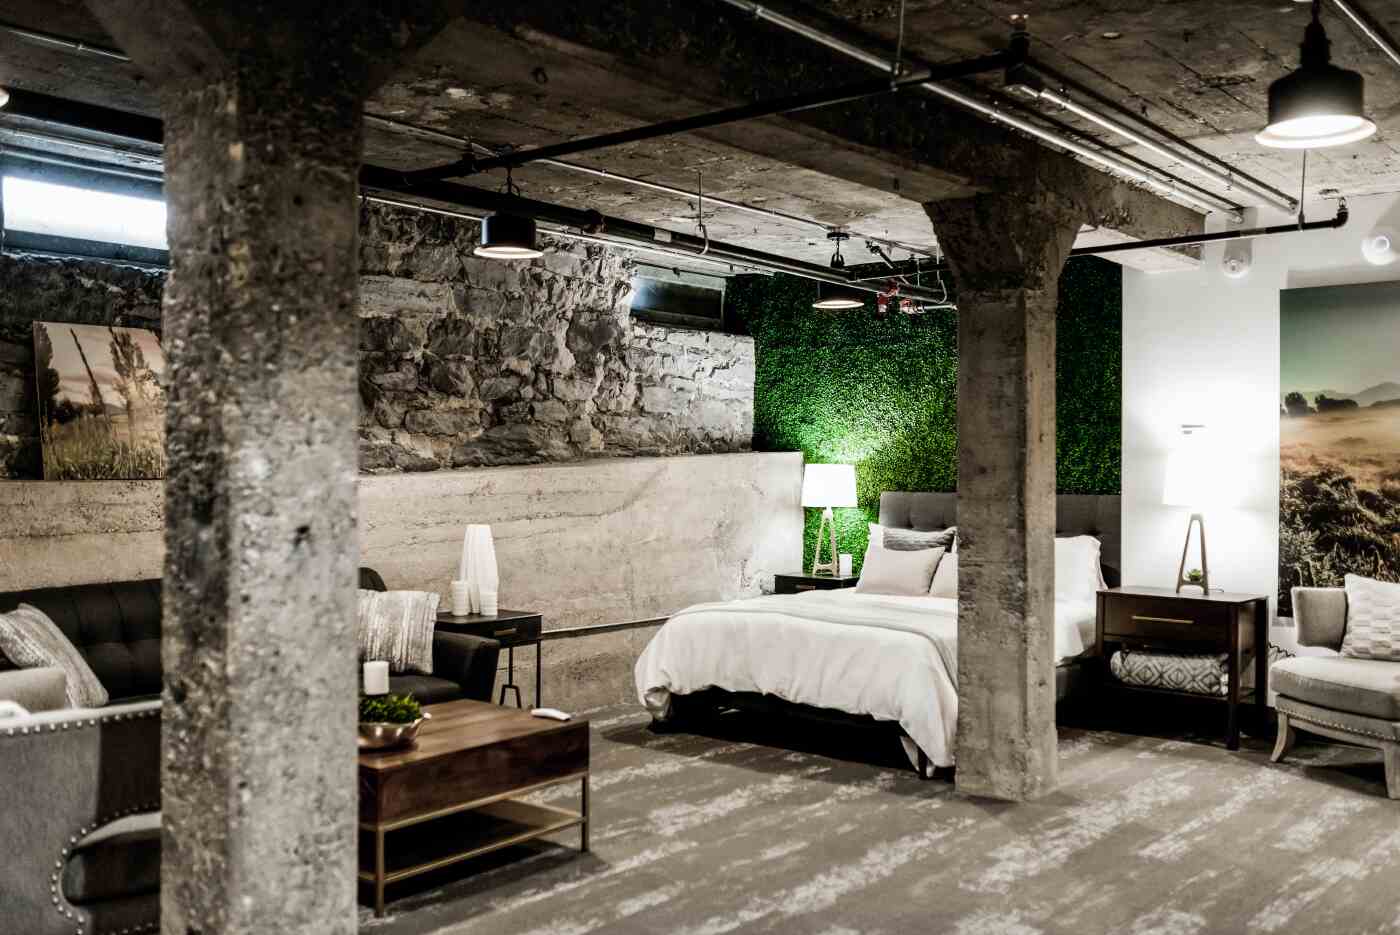 This conversion idea might sound a bit boring, but if your primary goal is to add value to your property without spending too much on the conversion, then you should invest in converting the basement into bedrooms.
Houses are usually valued on the number of bedrooms they have; each decent-size bedroom can add thousands to a property’s value.
You can make one or more bedrooms depending on the amount of space available, or you can even convert the basement into a large studio apartment or annexe.
6. Utility Room
Okay, so we’ll be the first to admit a utility room isn’t the most exciting of cellar renovation ideas. But it is one of the most practical and popular cellar conversion ideas in the UK.
While it might not be as glamorous as an underground cinema or personal gym, a utility room adds extra space that can be used for washing machines and tumble dryers, can be used as a pantry, or as a simple storage area.
An added utility room not only makes your home more practical and easy to live in, but it will free up space above ground that can be turned into more exciting rooms. As a generic conversion idea, a utility room also makes your home more marketable in the future and increases its value.
7. Home Office
With remote work becoming more popular, home offices have become increasingly sought after by professionals. A home office is one of the best cellar conversion ideas, and it’s an excellent way to build a workplace that’s secluded and separate from the rest of the house.
Your new home office can have all the equipment and tools you need to work from home. You can install a desk, ergonomic chairs and lighting that keeps you comfy while you work, as well as having plenty of space for televisions screens, computer monitors, printers and filing cabinets.
8. Playroom
Are the kids running you ragged in the living room? Have you run out of space for their toys or do you just need some peace and quiet in the afternoons? Then why not consider turning your cellar space into a playroom?
A playroom is a great use of your basement, and it’s a useful place to store your kids’ toys or to set up their PlayStation. Basements are easily soundproofed, and that means the children can be as loud as they want without disturbing the adults upstairs!
9. Wine Cellar
A wine cellar is a simple concept, but in our opinion it’s one of the best basement conversion ideas. You can keep your household and guests happy with an endless supply of wine that’s easily accessible, and easily topped up when running low.
A wine cellar is the perfect way to convert small basement cellars into a useful space, and it can be as easy to complete as installing wine racks against the walls. Of course, if you take your wine seriously, you can add modifications that allow for temperature control to keep those vintages in the best possible condition.
Other Ideas
It all starts with an idea. Music studios, gyms and home offices are just the start; there are so many more basement renovation ideas to inspire your new cellar conversion. You can create an underground kitchen, art studio, entertainment or party hosting venue, and so much more.
Some people may also look at using the space within the basement to create a swimming pool or transform it into a self-contained flat. With enough space and budget, most things are possible.
Contact Danford, Brewer & Ives to Make Your Basement Ideas a Reality
At Danford Brewer & Ives we’re basement conversion experts. With many successful projects completed, we’re the perfect partners for anyone looking to have a basement conversion.
To discuss your plans further, simply contact DBI and book an appointment for one of our site surveyors to visit you and run through some options.
Basement Conversion Cost
How Much Does a Basement Conversion Cost?
Do you have an under-utilised basement space that’s begging to be renovated? This is where Danford, Brewer & Ives, your basement conversion specialist, can make your underground dreams become a reality.
Basements have so much potential. They aren’t just old store cupboards for tumble dryers or ironing boards. With a little vision, planning and help from the experts, your basement can become a fully functioning, practical and liveable addition to your home. And given the lack of land in the United Kingdom, if you can’t build an extension at ground level, then why not look underground?
Your basement could be a whole new living space, but we know you’re wondering: how much does a basement conversion cost in the UK? Keep reading, as we explain everything.
How Much Do Cellar Conversions Cost?
A basement or cellar conversion is one of the best ways to create a new space on your property. But naturally, you’ll want to know roughly how much you might expect to spend on such a project.
You need to remember that a basement conversion is a large building project that requires professional expertise, so it’s important to invest your money wisely rather than simply going for the cheapest option.
The overall cost of basement conversion in the UK will depend on a number of different factors. The biggest factor to consider will be the existence, or non-existence, of available cellar space. If your home already has a cellar space of reasonable size, then it will take less work to shape this into a liveable area. If the cellar space is small, needs extending, or if you need an entirely new space excavated and underpinned, this takes more time, work and money.
The main factors you’ll need to consider when planning the budget for a basement conversion include:
- The size of the basement conversion
- The complexity of the basement conversion
- The type and number of materials needed for construction
- The interior design, furnishings and decoration needed to complete the basement conversion
You may be quoted a basement conversion cost per square metre, so of course, the larger the project, the more budget that’s needed. For accurate cost estimates, you’ll need to have a basement conversion specialist carry out a detailed survey.
Are Basement Conversions Worth It?
We often see basements as dark, dingy and smelly places that are best avoided, but here at Danford, Brewer & Ives, we want to change your perception of the basement. Basement conversions have so many fantastic benefits, and it’s the potential of this underground space that we love the most.
Here are some of our favourite basement conversion benefits that, in our professional opinion, always make the work and investment worth it:
- Provides an extra space or living room to your home
- Allows you to be creative with your new room
- Save on garden space as you extend below ground rather than horizontally
- Rent the room out to provide yourself with extra income
- Increase the value of your property
But what might you do with a basement conversion? A basement conversion can be a whole new living space. Okay, so you’ll probably have to chuck out those old paint tins and toys that are lurking down there at the moment, but once the space has been fixed up, lighting has been added, the basement has been waterproofed and damp proofed, then your options are limitless.
Here are a just a few of the great ideas to inspire your basement conversion:
- An extra bedroom or guest room
- A new living room
- A games, party or entertainment room
- A new bathroom
- A spare utility or storage space
- A work office or writing room
But to realise these benefits, you need someone who can get the job done. And that’s where Danford, Brewer & Ives comes in.
How Long Does a Basement Conversion Take?
A new basement conversion can take anywhere from a few weeks to (more likely) a few months to complete. This takes into account the various stages involved in any basement conversion project, which requires planning, surveying, construction and finally decoration.
There are three primary stages involved in the process. These are:
- The initial survey and planning stage. This involves a professional taking measurements, drawing up plans and setting time frames and budgets for the project.
- The construction phase. This is when your basement conversion is built and waterproofed.
- The final decoration stage. This is when the interior is finished and furnished, and when your basement conversion takes shape.
How long this takes will depend on the extent and complexity of the work required. To understand, it’s important to consider the work that’s required in order to turn a dingy, mouldy cellar into a bright and liveable space.
Much of this is down to waterproofing, sealing, drainage and adding effective lighting. In this respect, there are two main methods employed by a basement conversion specialist in order to seal and waterproof the space. The first is simply sealing the basement using cement-based products that hold water back. This requires excellent drainage outside to work long term, as otherwise the pressure build-up will affect the structure of the property.
A second method is installing a cavity drain membrane. Water ingress is then controlled by a plastic membrane, which is gathered in drains and routed to the external drains using a sump pump. This avoids any build-up of pressure, while an air gap behind the membrane allows the structure to ‘breathe’ and dry out when necessary. This membrane is produced from high quality, high-density plastics such as polyethene, which is long lasting, and vapour and gas-proof. This membrane allows a basement space to be fully sealed, waterproofed and drained, while furthermore, it can be protected against dampness.
Once this stage is complete, the basement can be finished with flooring, electrics and wiring can be installed, lighting can be added and any further plumbing services constructed. After this, the walls can be insulated and plastered, and then the interior design and furnishing can begin in earnest.
As you can see, a lot of work goes into a basement conversion, and each project will have a varied timescale based on the complexity and size of the project.
How Much Will a Contractor Charge to Finish a Basement?
So, how much will a basement conversion specialist charge for the time needed to finish a project? Again, this depends on the complexity of the basement conversion, but with a professional team like Danford, Brewer & Ives, you can only expect to receive the best prices and the best service.
The ‘basement tanking’ work we’ve described above is our expertise, and as a basement conversion is often required as part of a larger project, we’re an ideal partner for builders, architects and property developers to work with.
If you run a company, you can make the most of our expertise and experience by subcontracting basement conversion work to us. If you’re an individual, then we’re also ready to help with personal property development projects.
And as well as providing basement conversion expertise, our team has the capacity to excavate and underpin new basement areas from scratch. Rest assured, we provide value for money as well as efficiency and skill in every project we undertake.
So, how much will a basement conversion cost?
A typical basement conversion in the Yorkshire and Teesside area is usually in a Victorian terrace with an existing space in the basement. These basement rooms are usually cold, damp and badly lit.
Provided the existing head height is adequate the price guide is between £875 – £1,600 per square meter. If the conversion works require any digging out, excavating or underpinning the work becomes more complex and more expensive. Underpinning usually costs between £1,500 – £2,000 per square meter.
To help you understand and get an idea of how much your basement conversion might cost we have provided 4 possible basement scenarios. Each one is based on 30m square of space below ground in a Victorian end terrace house.
Option 1. Simple Basement Conversion
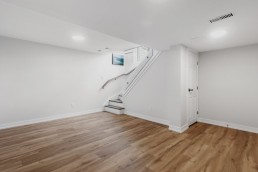
This basement is a single room with 3 external walls and 1 party wall. The head height is more than adequate at 2.2m. The room is currently being used a garden/ storeroom. In the winter periods, water appears to rise up through the stone-flagged floor and is leaving the space continuously cold and damp. There is an existing solid stone staircase leading up to the main house and a small light well to the rear of the room.
Using a cavity drain membrane system, we will transform this space into a warm, dry storage area.
To achieve this we will install a perimeter drainage channel with flushing points at each change in direction. As there is no natural drainage present we will install a sump and pump with a high level battery alarm system. The drainage and pumps are fully maintainable and when combined with cavity drain membranes forms a waterproof structure to comply with current British Standards 8102 (2009) – The code of practice for protection of below ground structures against water from the ground. Your basement is now ready for the ‘fit out’ stage.
A new insulated timber floating floor will be installed and the walls lined with independent timber studs. The 1st fix electrics for the supply of a new socket and lighting circuit will be carried out along with plumbing alterations to add a new radiator. The walls and ceiling will then be plaster boarded and plastered to a finish.
The electric and plumbing works will be finished and signed off as required. The basement conversion works are now complete and ready for decorating. As this space will only be used as storage Building Regulations do not apply and therefore insulation is not a requirement.
Summary
- 4 walls, room area approx. 30m2
- Cavity drain membranes to walls and floor
- Drainage channel and mechanical pump system
- Timber floating floor and studwork
- Plasterboard and plaster finish
- Electrics & Plumbing
- Party Wall agreement
- 10 year Independent, insurance backed guarantee.
Estimated Cost £ 26,250 + VAT (£875/m2)
Option 2. Standard Basement Conversion
A standard basement conversion would involve the same works as Option 1 with the addition of needing to have Building Regulations as the space is now to be used to provide an extra living space for the property. This will include the addition of insulation within the studwork and ceiling areas. There is also the inclusion of an internal load-bearing wall that would require lining with cavity drain membrane and stud work.
Summary
- 4 external walls (30m2)
- 1 Internal (load bearing wall)
- Drainage channel and mechanical pump system
- Timber floating floor and studwork
- Insulation
- Plasterboard and plaster finish
- Electrics & Plumbing
- Party Wall agreement
- Building Regulations
- 10 year Independent, insurance backed guarantee.
Estimated costs £31,500 + VAT (£1050/m2)
Option 3. Complex Basement Conversion
A complex basement conversion has all the detail as standard basement with the addition of a more sophisticated pump system which includes a secondary pump with battery back-up. This type of basement conversion would also include digging out and creating a new external doorway with concrete access steps. Creating this opening would most likely require planning approval.
Summary
- 4 external walls (30m2)
- 1 Internal (load bearing wall)
- Drainage channel and mechanical pump system with battery back up
- Timber floating floor and studwork
- Insulation
- Plasterboard and plaster finish
- Electrics & Plumbing
- New external doorway with concrete steps
- Party Wall agreement
- Building Regulations
- Planning permission fees
- 10 year Independent, insurance backed guarantee.
Estimated cost £48,000 + VAT (£1600/m2)
Option 4. Complex Basement Conversion with Underpinning.
This type of conversion requires increasing the existing headroom. To achieve this the internal floor slab will be excavated to the required depth. The existing foundations will also require extending. This is done using a process called underpinning. With the help of our Structural Engineer we can design and specify the detail required to carry out these works in a safe and controlled manner. Once the underpinning is complete the drainage and membranes are installed and the fit-out completed.
Summary
- 4 external walls (30m2)
- 1 Internal (load bearing wall)
- Drainage channel and mechanical pump system with battery back up
- Concrete floor and studwork
- Insulation
- Plasterboard and plaster finish
- Electrics & Plumbing
- New external doorway with concrete steps
- Party Wall agreement
- Building Regulations
- Planning permission fees
- 10 year Independent, insurance backed guarantee.
- Underpinning and excavation works
Estimated cost £95,000 + VAT
Contact Danford, Brewer & Ives to get the best deal
If you’re planning on building a basement, Danford, Brewer & Ives has an expert team of basement converters ready to assist. Contact Danford, Brewer & Ives today to find out how we can make your basement dreams a reality.

Internal Wall Insulation
It’s estimated that up to 50 per cent of a building’s lost heat escapes through the walls. For homeowners that’s a lot of energy to lose, and it quickly leads to mounting gas or electric bills.
Internal wall insulation can help you to lower your energy bills by keeping the heat inside your property. If you’re interested in learning more about internal wall insulation, contact Danford, Brewer & Ives’s team of experienced insulation installers to find out more.
What Is Internal Wall Insulation?
Internal wall insulation is designed to insulate the inside of a home by forming an effective barrier that traps heat and stops energy from being lost to the outside. It’s most commonly used to insulate solid stone or brick walls that have no insulated cavity space and therefore lose an incredible amount of heat through the walls.
How to Install Internal Wall Insulation
The primary goal of internal wall insulation is to provide an insulating barrier that protects against heat loss. This can be achieved in a number of ways.
The most popular method of insulation is to build a second layer of ‘wall’ against the existing solid wall, leaving a space in between that can be filled with effective insulating materials.
Internal wall insulation can also be combined with damp proofing, as a damp-proof course and other forms of damp protection not only create a waterproof barrier but act as insulators too.
The best method of insulation depends on a number of factors, including the type of wall, the size of the home, and the extent of the heat loss problem. For this reason, it’s important to seek professional advice when installing internal wall insulation.
How Thick Should Internal Wall Insulation Be?
To work as an effective insulator, internal wall insulation must be at least 60mm thick. The exact thickness of the insulating material will depend on how much space is available inside the room; where possible, it should be extended to 100mm in thickness.
Homeowners need to bear in mind that the thicker the insulation is, the more effective it is at retaining heat. Obviously, thicker insulation takes up more space though.
How Much Does Internal Wall Insulation Cost?
The overall cost of an internal wall insulation project depends on a number of factors. The major points to consider are:
- Type of material used for insulation
- The number of rooms being insulated
- Time taken for the work to be carried out
Homeowners also need to factor in any redecoration work that needs to be carried out, as well as electrical fittings that might need to be moved or replaced to make way for internal wall insulation.
Average costs for internal wall insulation work out to be around £50 per square metre, but you’ll need to have a survey carried out for a more accurate cost estimate.
Contact Danford, Brewer & Ives for More Information About Internal Wall Insulation.
For more information and advice on internal wall insulation, please contact our friendly team on 01765 804050 or fill in our online contact form. Our experienced specialists are on hand, ready to offer expert advice tailored to your needs or arrange a thorough survey of your home.

The Ultimate Guide to Damp-Proof Course
If you’re looking to damp proof your home, a damp-proof course is an essential protective measure. A damp-proof course is designed to stop water from rising up into a home by creating an impermeable waterproof barrier, and it can protect your home from potentially expensive and dangerous issues that may result from damp.
Modern homes are fitted with a damp-proof course as standard, but older homes may not have ever had one installed. A damp-proof course can fail for any number of reasons, but a damp-proof specialist can help you to identify and fix problems before they can cause damage.
To help you understand the importance of damp proofing your home, the experts at Danford, Brewer & Ives have put together their ultimate guide to damp-proof courses.
What Is a Damp-Proof Course?
A damp-proof course is designed to protect a property against the dangers posed by moisture, damp and excess water. When properly installed, a damp-proof course creates an effective waterproof barrier that prevents moisture from rising up through the brickwork and masonry, and then into the home.
A damp-proof course is generally fitted just above ground level, with the main goal being to protect against rising damp. There are several different types of damp-proof courses that can be installed, with the most common method being to inject a damp-proof cream into the ground floor masonry.
Without a damp-proof course to create a waterproof barrier, excess groundwater and moisture can rise up through the brickwork and cause damage to a property. If left unchecked, this damp problem can lead to structural and health and safety issues within your home.
How Do Damp Proof-Courses Work?
All damp-proof courses are intended to create a protective barrier that stops water from rising from the ground and into the home, but there are different types of damp-proof course and they all work in slightly different ways.
Any damp-proof course needs to be installed at least 150mm above ground level. This is a legal requirement, and it ensures that the waterproof barrier is formed above groundwater level. Because a damp-proof course is intended to protect primarily against rising damp, which enters a building from the ground upwards, they are generally installed in the masonry or brickwork on the bottom floor of a home.
Modern damp-proof courses consist of chemical injections, but they are at their most effective when used in conjunction with other damp-proofing methods, such as a damp-proof membrane. Here are the most common varieties of damp-proof courses that can be installed in your home:
Chemical Damp-Proof Course
A chemical damp-proof course is injected into the masonry and brickwork of a home, and is at its most effective when placed 150mm above ground level. It consists of a specialist damp-proofing cream that forms an effective waterproof barrier once it’s settled into the brickwork.
To be installed, holes are drilled directly into the wall at the intended level, and the chemical damp-proof course is then injected into them.
Mortar Damp-Proof Course
A mortar damp-proof course is also injected directly into holes drilled into a wall, and again it must be injected 150mm above ground level for it to work effectively.
Mortar damp-proof courses consist of a chemically enhanced mortar that can fill any holes in the masonry and brickwork that might be causing damp problems.
The mortar, once injected, creates a waterproof barrier by filling in these holes and removing any chance of rising damp moving through the walls by removing any gaps in the brickwork.
Non-Chemical Damp-Proof Course
Non-chemical damp-proof courses are also available, with the most popular method being an Electro Osmotic damp-proof course. This works differently from a chemical damp-proof course because it involves installing metal wiring to create an electric charge.
Rather than creating a physical, waterproof barrier, this electric charge changes the polarity of the wall itself. This means that rising damp isn’t drawn upwards through the brickwork, but is repelled downwards.
This system isn’t as common, as it’s more difficult and time-consuming to install in comparison to a simpler chemical injection.
Damp-Proof Membrane
A damp-proof course creates an effective barrier against rising damp, but it works best when installed alongside other damp-proofing methods. The most popular damp-proofing method is a damp-proof membrane, which creates a physical impermeable barrier that protects against damp and moisture.
A damp-proof membrane is essentially a thick sheet of waterproof material that’s installed above or below the floor. A damp-proof membrane needs to be at least 1,200-gauge thickness and it needs to be installed so the sheets overlap, and therefore create a continuous barrier.
Why Do I Need a Damp-Proof Course in My Home?
The main goal of a damp-proof course is to protect against different forms of damp and water damage that could cause costly and even dangerous repairs. Damp is caused by excess moisture and water, and the damp-proof course exists to create a waterproof barrier against this.
Damp can cause any number of problems inside your home, including:
- Structural damage
- Decaying timbers
- Damaged plaster and decorating
- Mould
- Wet and dry rot
- Respiratory illness
There are several types of damp that can be found inside a home, including condensation, rising damp and penetrating damp. A damp-proof course is primarily intended to protect against rising damp, which occurs when water rises up through the brickwork from ground level using capillary action to move vertically through bricks and mortar.
If rising damp is left unchecked, it can eventually cause serious structural damage to the foundations of your home. Other unwanted side effects include fungus and mould, which can lead to respiratory illnesses and serious health and safety dangers for anyone who lives in the house.
Lack of a damp-proof course is one cause of rising damp, although it can also result from major leaks, floods or other broken infrastructure, such as drains or pipes. For this reason, it’s important to ensure that your home is fully damp proofed, with an effective damp-proof course in place to protect against excess moisture and water.
How Do I Know If My Home Has a Damp-Proof Course?
Your home should already have some form of damp-proof course installed. Since the late 19th century, it’s been a legal requirement for a property to have a damp-proof course installed. This means that modern homes will have one already in place, and it’s very likely that much older homes will, at some point, have had a damp-proof course installed too.
However, there is a small chance that a Victorian-era house may never have been upgraded with a modern damp-proof course. If this is the case, then it’s important to have a modern damp-proof course installed quickly and to have any other damp-proofing measures updated.
A damp-proof course is also liable to deteriorate over time, in which case you could find your home affected by damp problems. The ground may shift, walls may sink, or brickwork and masonry may crumble after the damp-proof course has been installed. Regular checks and a professional damp and timber survey can help to identify any existing issues with the damp-proof course in your home, or in a property you might be hoping to purchase.
If you are worried that your damp-proof course is failing, there are several key signs to look out for. The following are all big indicators that your home has a damp problem, which could be the result of a damaged damp-proof course:
- Damp, musty or mushroomy smells
- Mould and fungal growths
- Damp patches on the walls
- Damaged plasterboards or wallpaper
- Crumbling or damaged masonry or brickwork
- Tide marks on the walls
- Unusual growths on the outer walls
You can spot signs of damp on both internal and external walls, but the most noticeable sign of damp is likely to be a strong musty smell drifting through the home. If you spot salty tidemarks on the walls, this is a common sign of rising damp, which as we’ve explained, generally results from a failed damp-proof course.
Of course, a failed damp-proof course isn’t the only cause of damp, and different types of damp can result in different problems and require different fixes. If you are worried about any issues relating to damp, then it’s important to have a professional inspection in order to correctly identify the cause and solution of the problem.
How Do You Fix a Damp-Proof Course?
A broken damp-proof course can either be fixed or replaced entirely. If you notice any of the key signs of damp in your home, then the first stage is to call in a professional for a damp survey.
The professional will identify the cause of the damp and the type of damp before recommending the best way to fix the problem. If the issue is a broken or missing damp-proof course, then they will recommend the best type of damp-proof course to have installed.
Before the damp-proof course is fixed, any damp needs to be removed. Once this has been done, the new damp-proof course can either be injected or fixed in place. This may involve removing brickwork or timbers to gain access, or it could be as simple as drilling holes into the walls and injecting a chemical damp-proof course.
How Much Does a Damp-Proof Course Cost?
The cost of a damp-proof course varies from one home to the next, as multiple factors need to be considered and priced up. The main factors that affect the overall cost are:
- The size of the home
- The type of damp-proof course
- The amount of work needed
- Damage already caused by damp
Let’s take a look at the above factors in more detail:
The Size of the Home
Broadly speaking, the larger the property is, the more it will cost to have a damp-proof course installed. This breaks down to a higher cost for more supplies and materials, and more time needed to fix the damp-proof course in place.
The Type of Damp-Proof Course
Different types of damp-proof courses have different costs associated with them. The best value damp-proof course is a simple chemical injection, while a physical damp-proof membrane can cost comparatively more per square metre to be installed.
The Amount of Work Needed
The amount of time and work needed to properly install a damp-proof course also has a large effect on price. If your home is older, safe installation could be more difficult and this causes an increase in price. If masonry or brickwork needs to be removed or if access to ground level is difficult, then costs will also rise.
Damage Already Caused by Damp
If your home is already affected by damp, then you need to have any damage repaired before having a new damp-proof course installed. You need to factor in costs to repair any structural damage, such as broken brickwork or decaying timbers, as well as any costs needed for redecoration later on.
Remember, the earlier you catch problems associated with damp, the sooner they can be fixed. If damp is left to fester and spread, then the cost needed to remove it and repair any damage caused is always going to increase the longer it’s left.
For an accurate estimation of costs, you need to speak with a damp-proofing expert. There are several factors to consider, and a damp survey will need to be completed before the total cost of a damp-proofing project can be considered by a professional.
Contact Us for More Information About Damp-Proof Courses
If you’re looking to damp proof your home, then a damp-proof course is essential. From the initial survey through to installation, the expert team at Danford, Brewer & Ives is ready to help with all of your damp-proofing needs.
Contact our team today for more advice on installing a damp-proof course, or to book your initial survey and consultation.
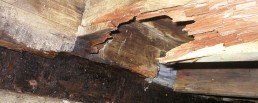
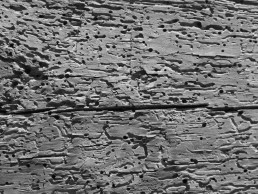
How to Stop or Prevent Wood Rot
Wood rot is a serious concern that not only damages the timbers in a building, but can cause hazardous structural problems within a home or commercial property.
There are two types of wood rot: wet and dry rot. Both types affect timbers by causing the wood to decay, and both thrive in wet or damp conditions. It’s essential to know how to prevent and treat rot before it causes damage.
In this article, we explore the best ways to stop and prevent wood rot.
What are the Different Types of Wood Rot?
The two types of wood rot – wet and dry rot – are both caused by fungal spores that are attracted to damp timbers where they find their optimal conditions.
Wet rot is attracted to areas of extremely high moisture content, and the fungal spores can slowly eat their way through even the strongest of timbers. Wet rot is isolated and doesn’t spread easily, but it can cause extensive damage if left untreated.
Dry rot on the other hand can spread throughout a property, as it rapidly makes its way through timbers. Dry rot needs much less moisture to survive, so spreads easier than wet rot.
How to Stop Wood Rot?
Both types of wood rot result in mushroom-like smells, so even if you can’t see the rot you’ll be able to smell it. It’s crucial that you act quickly before rot can take hold or spread through a building.
Wet rot can be treated with effective fungicides, which destroy the fungal spores. However, if the rot has eaten into timbers, these will need to be removed and replaced to prevent structural hazards. Because wet rot thrives in moist conditions, it’s important that any source of moisture is removed and that the area is properly ventilated.
Dry rot can cause damage more quickly than wet rot, and all sources of moisture need to be removed to stop it from spreading. Fungicides can be used to treat and kill existing spores, as well as preventing others from spreading. However once the rot has taken hold, timbers often need to be removed and replaced to ensure the structural stability of a building.
How to Prevent Wood Rot?
While wood rot treatments are effective ways to remove existing types of rot that have already taken hold in a building, it’s always preferable to prevent rot from spreading in the first place.
Dry and wet rot treatments can be very disruptive, particularly if the rot has begun to spread through important timbers and supports in the home. Supporting timbers may need to be removed and replaced, or else they can become a structural health and safety hazard.
These invasive and intense treatments are much more expensive than prevention techniques. Homeowners can prevent rot from taking hold through adequate ventilation, preventing the build-up of moisture on wooden surfaces, and applying fungicidal wood rot treatments that prevent rot from spreading.
Get More Information on Wood Rot Treatments
For more information and advice on how to stop and prevent wood rot, please contact our friendly team on 01765 804050 or fill in our online contact form. Our experienced professionals will be on hand with expert advice tailored to resolve your problem.
How Long Does Woodworm Treatment Last?
Woodworm infestations can cause serious damage to the timbers in your home, wreaking havoc across wooden furniture or burying their way deep into important wooden supports.
Serious structural damage is a major health and safety hazard, so it’s vital to have any woodworm infestation swiftly treated by a professional.
But what does woodworm infestation treatment involve and how long does a treatment last? In this article, we explain how long woodworm treatments take to apply and how long they stay effective.
What Does Woodworm Treatment Involve?
Woodworm is a term that’s used to describe a range of woodworm species that burrow deep into timbers. Woodworm larvae leave behind distinctive trails as they dig their way into timbers searching for cellulose. Eventually, those tiny holes can lead to dangerous structural instability if left untreated.
Woodworm first need to be located and identified by a professional, before a woodworm treatment is selected and applied. Treatments vary depending on the species and the extent of the infestation. If woodworm are only present at surface level, surface sprays or pastes can be used. If the woodworm are deep in the timber, injections need to be applied to reach them.
The treatments are designed to kill existing woodworm in the timber, while also providing an anti-woodworm surface that prevents further infestation. For more details, read this article on how to treat woodworm.
How Long Does Woodworm Treatment Take to Work?
Woodworm treatments work instantly to kill woodworm, and eliminate eggs and larvae in the timbers.
If woodworm are present on the surface, then treatments can be applied quickly and effectively. Depending on the extent of the infestation, the treatment can take just a few hours to be applied throughout the entire household.
If woodworm have burrowed deeper into timbers or are located in less accessible areas of a property, treatment can be more complex but doesn’t ordinarily take longer than a day to be completed (although this depends on the size and extent of the infestation).
So, How Long Does Woodworm Treatment Last?
Woodworm treatments are long lasting and guaranteed to prevent the return of any infestation for years at a time. As strong chemicals, when applied correctly woodworm treatments are able to kill and prevent a return of any woodworm for decades.
In general, woodworm treatments are proven to be effective for 20 years, although in practice this can actually be much longer. The woodworm treatment creates a protective barrier, which prevents new woodworm from taking hold and laying eggs that can hatch into larvae.
For this reason, it’s an excellent idea to not only eliminate woodworm where they are located but to apply treatment throughout a household to stop any opportunity for outbreaks. Remember, prevention is always preferable to treatment when it comes to woodworm!
Get More Information on Woodworm Treatment
For more information and expert advice on treating woodworm in your property, please contact our friendly team on 01765 804050 or fill in our online contact form. Our experienced professionals will be on hand to help you with your woodworm concerns.

What Does a Damp Survey Involve?
Professional surveyors carry out damp surveys in order to identify existing cases of damp within a building. They are often combined with timber inspections to form a damp and timber survey.
These investigations aim to locate potential issues such as wet and dry rot or woodworm infestations, as well as damp.
In this article, we take a look at what a damp and timber survey involves and explain when you might need one.
What Is a Damp Survey?
Damp surveys are independent reports compiled by damp specialists after a thorough inspection of a property.
Carried out as part of a damp and timber survey, the report highlights any structural issues, causes of damp or rot, and more. A standard damp and timber survey aims to identify any of the following:
● Condensation
● Wet and dry rot
● Rising damp
● Penetrating damp
● Woodworm infestations and other pests
A damp and timber survey identifies any existing issues and potential problems that may arise in the future, before providing recommendations for treatment, repair, or prevention.
When Do I Need a Damp and Timber Survey?
If you’re worried that your home’s timbers may be contracting rot or that penetrating damp is getting into the walls, then a damp and timber survey is the best course of action. Damp Surveyors will identify and isolate existing problems, and make recommendations for prevention and repair.
Prospective home buyers or property investors should always have a damp and timber survey carried out before they make a purchase.
In fact, the vast majority of mortgage lenders will ask for a damp survey to be carried out before they loan any money, and surveys are often carried out as part of a wider homebuyer’s survey or building survey.
It’s an excellent way to catch any existing problems, giving you the opportunity to negotiate repairs or better prices with the seller, while ensuring you’re not sprung with hefty repair costs after you’ve made a purchase.
How Long Does a Damp and Timber Survey Take?
The length of time a damp and timber survey takes to be completed depends on the size of the property and the extent of any existing damage.
Other factors include the age of the building and how accessible its timbers are. If floorboards need to be removed, for example, to check for signs of an infestation or hidden damp, then surveys take longer to complete.
In most cases, a thorough damp and timber survey takes no more than a few hours, and it’s rare for a survey to take up a whole day. Once surveyors have collected the data and photographs they need, they compile a report before presenting you with their findings and recommendations at a later date.
Get A Damp and Timber Survey
For an impartial discussion about your damp concern or damp surveys, please contact our friendly team on 01765 804050 or fill in our online contact form. Our experienced damp proofing professionals will be on hand with expert advice tailored to resolve your problem.
Image courtesy: Nick Youngson
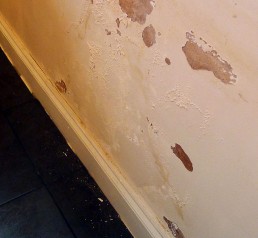
How Do You Stop Damp Coming Through Walls?
Damp, moisture and water can all cause unwanted or even dangerous damage to a home when they start penetrating the walls.
Damp damage can lead to mould, wood rot and even the collapse of structural supports within a home or commercial property, so it’s important that your home is kept damp free and damp proof.
In this article, we take a look at the best ways to damp proof your property.
Does Your Property Have a Damp Proof Course (DPC)?
A damp proof course (DPC) is the most effective barrier against rising damp, a form of damp that occurs when water from the outside seeps upwards into the walls of your home.
It’s a protective, waterproof layer that stops damp from rising. Damp proof courses can vary but often consist of a simple plastic layer or a more effective chemical membrane.
Modern homes are required to have a damp proof course, however many older properties might never have had one installed. Damp proof courses can also break or degrade over time, leaving your building defenceless against rising damp.
To protect against damp, you need a DPC and you need it to be working. Luckily, they can be repaired or installed by a professional.
Are There Any Water Leaks?
Leaking water is one of the biggest causes of damp, and it’s often due to faulty or overloaded infrastructure.
Bad plumbing or leaking pipes can quickly lead to dampness in the walls, while blocked drains and gutters can cause water to flood through the roof or external walls.
Check your plumbing is up to scratch and that your pipes aren’t blocked, and you’ll prevent damp from getting into the walls.
Is Your Property Ventilated?
Damp doesn’t just get into a home from the outside; it can also be caused by internal problems. The biggest culprit is often a lack of ventilation.
Poor ventilation causes a build-up of condensation (particularly in areas where hot and cold air meet, such as the kitchen or bathroom). This leads to damp getting into the internal walls of a property, which can then lead to mould or wood rot.
If you’re struggling with condensation, then a simple solution is a dehumidifier. Often, it’s enough just to leave the windows open for longer, too!
Have a Damp Survey Carried Out
It can be difficult isolating the cause of damp in a building, particularly if there’s a problem with the structure or damp proof course.
For this reason, it’s recommended to have a professional damp survey carried out by a specialist. As well as identifying existing problems, they can also provide recommendations for damp proofing the property. After all, preventing damp problems from arising is always preferable to carrying out expensive repairs.
Contact Damp Proofing Specialists in Yorkshire and Teesside
For more information and advice on damp proofing your home or commercial property, then please contact our friendly team on 01765 804050 or fill in our online contact form. Our experienced specialists will be on hand and ready to offer expert advice tailored to resolve your problem.
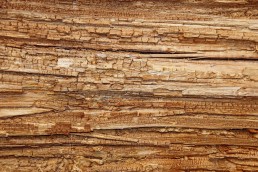
How to Treat Wood Rot
Wood rot is caused by fungal spores eating their way through wooden timbers, be it wooden furniture, door frames, or even the structural supports holding a building together.
As timbers decay they become increasingly unstable and dangerous, leaving a major health and safety hazard inside your home or commercial property.
So how do you treat wood rot and prevent it from returning? In this article, we explore the best ways to treat wood rot.
What are the different types of wood rot?
There are two distinct types of wood rot that need to be considered before any treatments can be recommended and applied. These are wet rot and dry rot.
Both types of wood rot are caused by fungal spores eating through cellulose found in timbers. Both only occur in wet and damp conditions, as the fungal spores are activated by moisture.
Wet rot requires extremely high levels of moisture to survive, so it’s only found in incredibly damp conditions. Wet rot mostly remains static, but causes large amounts of damage when left untreated.
Dry rot requires much lower moisture levels to thrive, so it can easily spread through a home from one timber to the next. Dry rot can quickly cause damage as it spreads, and needs to be treated rapidly.
What are the signs of Wood Rot?
While wood rot might not be visible on the surface, it could be causing massive amounts of structural decay beneath the timbers.
For this reason, it’s important to be given a proper diagnosis by a professional who can locate and identify different types of wood rot that could be afflicting your home, before recommending the best course of treatment.
If you notice any of the following signs of wood rot, it’s time to call in a specialist.
● Musty or mushroom-like smells
● Growth of mould
● Soft timbers
● Discolouration of timbers
● Visible decay of timbers
● Areas of damp
How to identify and treat wood rot?
The exact treatment depends on the extent of the wood rot, how long it has been spreading for, and the damage that’s already been caused.
The first step is to identify where the rot has taken hold and the type of rot that’s present in the property. While dry rot can be very visible, wet rot is often hidden out of sight.
The most effective method of wood rot treatment is to apply a fungicide or chemical spray. This kills any existing spores and creates a protective anti-fungal layer that stops future fungal spores from establishing themselves on timbers. This only works however if the rot is on the surface.
If the wood rot is below the surface or has already caused extensive damage to important, structural timbers, then the only treatment is to remove the timbers and replace them. This is much costlier and more disruptive, which is why it’s so important to act fast when you suspect the presence of wood rot in your property.
Get in touch with Wood Rot Treatment Specialists
For more information and advice on how to treat wood rot – both wet and dry rot – then please contact our friendly team on 01765 804050 or fill in our online contact form. Our experienced professionals will be ready to offer expert advice tailored to resolve your problem.
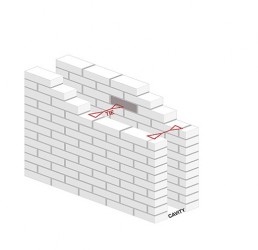
What Are Cavity Wall Ties Used For?
Cavity wall ties are the unseen supports holding the walls of a building together. They are an essential yet invisible element of building construction, providing stability and ensuring that walls don’t collapse.
Despite their importance, cavity wall ties are rarely top of maintenance lists for homeowners; most of us don’t even realise they’re there! In this article, we explain what cavity wall ties are and what they are used for.
What are Cavity Wall Ties?
Cavity wall ties are metal strips or metal rods used to connect walls together, providing structural support to walls and to a building as a whole.
Cavity wall ties are placed between the inner and outer walls of a home (the space in between the two layers is called the cavity, and it’s there primarily for insulation). These thin metal rods connect the two layers together, essentially holding them up.
Given how important this sounds, you might be surprised to see just how thin cavity wall ties are. However they’re produced from incredibly strong metal alloys, with steel or zinc being the most common.
Why are Cavity Wall Ties so Important?
It’s always necessary for broken or damaged cavity wall ties to be replaced, because the role they provide is vital to a building.
Cavity wall ties hold the bricks of the two layers of a wall together, allowing the wall to stand as one firm unit rather than two individual sections. This provides an excellent level of structural support for a property as a whole, and stops structural instability or collapses from occurring.
Cavity wall ties also enable better insulation, allowing a building to be managed in an energy-efficient manner. They help to maintain proper ventilation by keeping the cavity wall space supported, which helps to avoid a build-up of moisture or damp between the walls.
What is Cavity Wall Tie Failure?
Homeowners need to look out for broken or damaged cavity wall ties that are the result of cavity wall tie failure.
Cavity wall tie failure can result in broken masonry, loose tiles and, in extreme cases, total collapse of walls. If broken wall ties aren’t replaced, the consequences can even be deadly.
While cavity wall tie failure can be the result of improper installation or poor brickwork, in the vast majority of cases failure is down to corrosion and rusting. Cavity wall ties are metal and therefore prone to corrosion when subjected to water.
This is a natural process. Regardless how well your home is damp-proofed, it can’t be stopped entirely; it can only be delayed. For this reason, it’s good to know what signs might indicate that cavity wall ties need replacing.
If you notice any of the following, contact a professional for a survey. They can identify the extent of the wall tie failures and recommend solutions for replacements.
● Cracks in the mortar caused by an expansion of cavity wall ties.
● Walls bulging outwards as a result of broken cavity wall ties.
Loose brickwork or, in severe cases, a collapse.
Danford Brewer & Ives is a Ripon based company that operates in the North East and specialises in cavity wall tie replacement. For more information and advice on cavity wall ties, please contact our friendly team on 01765 804050 or fill in our online contact form. Our experienced professionals will be on hand and ready to offer expert advice tailored to resolve your problem.