How Do You Waterproof Masonry Walls?
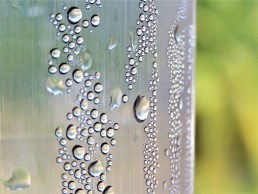
When masonry walls begin to crumble, age and deteriorate, they can quickly lose their ability to repel moisture and water. Once masonry has lost its waterproofing, then rising damp and penetrating damp can seriously begin to damage your property.
Keeping your masonry waterproofing fully sealed is therefore an important task for any homeowner. If you’re wondering how to keep your home damp free throughout the year, here’s our guide to the best ways to keep your masonry fully waterproofed.
What Is Masonry Waterproofing?
Masonry waterproofing is the term used to describe how masonry walls, whether constructed from brick, concrete or other materials, have been effectively sealed in order to create a protective barrier against moisture and water.
There are several different methods of masonry waterproofing that homeowners can have installed, but the goal of all these methods is to keep water outside and to keep your home dry on the inside – no matter how hard it’s raining. Masonry waterproofing stops your home from being affected by potentially serious problems such as damp or mould, while in many cases providing an extra layer of insulation that helps to save energy while keeping your house warm.
The most popular methods of masonry waterproofing include:
- Applying waterproofing agents
- Repairing broken masonry
- Installing a damp proof course
- ‘Tanking’
Let’s take a closer look at the most common ways to keep masonry waterproofed.
Applying Waterproofing Agents
One of the simplest methods of masonry waterproofing is to apply waterproofing agents to external walls. There are many different types of waterproofing agents available, but the best products will help to waterproof your masonry walls for many years.
Waterproofing agents include waterproof masonry creams and resins, which when properly applied allow masonry to be fully sealed. This creates an effective waterproof barrier that repels rain and stops moisture from seeping into masonry walls.
Repairing Broken Masonry
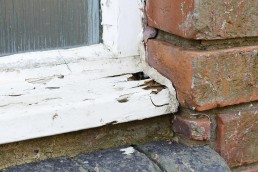
If you’re experiencing leaks or have noticed signs of damp inside or outside the house, there’s a high chance that masonry has broken or deteriorated. Brickwork may have been damaged, mortar might have crumbled or important structural elements such as cavity wall ties may have broken.
All of these problems can result in water seeping into the home through gaps in broken masonry. If this happens, it’s important to identify where the masonry has failed before having it fixed professionally. Ensuring that any gaps in the masonry have been filled in, or that any broken or damaged bricks have been repaired or replaced helps to ensure that your walls are fully waterproofed.
On a wider scale, it’s also important to keep external and internal features of your home, such as tiles, gutters, windows and doors, well maintained and fully sealed in order to avoid water finding a way into the brickwork or inside your home.
Installing a Chemical Damp Proof Course
A chemical damp proof course is an excellent way to waterproof masonry walls. When properly installed, a DPC stops potentially dangerous issues such as rising and penetrating damp from affecting a property.
A chemical damp proof course can be injected directly into a masonry wall, and it’s an effective and long-term option that helps homeowners keep their property fully waterproofed. It’s particularly effective when used in conjunction with other methods of waterproofing, such as coating masonry walls with waterproofing agents and ensuring your home is fully sealed against damp.
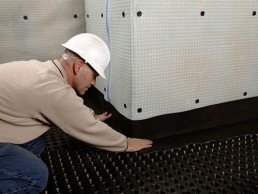
'Tanking'
‘Tanking’ is a process designed to completely seal and waterproof masonry walls below ground level. It’s an option commonly used to seal areas of a home such as a basement or bottom floor, with the goal being to create a tank-like barrier that stops water from seeping into the building.
There are several ways to carry out ‘tanking’, but the most common method is to strip back a masonry wall, before applying waterproofing agents and plastering the wall to finish and fully seal it.
Contact Danford, Brewer & Ives for More Information About Masonry Waterproofing
Masonry waterproofing is essential if you want to keep your home dry throughout the year. We recommend consulting a damp proofing specialist for expert advice on the best method of masonry waterproofing for your property.
For more information on masonry waterproofing, please contact our friendly team on 01765 804050 or fill in our online contact form. Our experienced specialists will be on hand, ready to offer expert advice tailored to your needs or to arrange a thorough survey of your home.
What Is Wet Rot in Wood?
Damp timbers, musty smells and dark brown stains are all signs that your home could be affected by wet rot. Caused by fungal spores feeding on damp timbers, if wet rot isn’t treated quickly, it can lead to potentially serious structural damage to your property.
Homeowners need to be aware of the initial signs of wet rot. If you suspect that timbers in your home could be affected by wet rot, it’s best to have a specialist survey carried out to identify and remove the cause.
In this article, the expert team at Danford, Brewer & Ives answer the question, ‘what is wet rot in wood?’ and explain how and why it needs to be treated.
What Is the Difference Between Wet Rot and Dry Rot?
There are two types of wood rot that can affect your home, and both are caused by fungal spores spreading and feeding off timbers. These two types of rot are known as wet and dry rot, and both require moisture to be present in order for the fungal spores to be activated.
But what is wet rot in wood? Wet rot is so-called because it requires much higher levels of moisture than dry rot. Wet rot can only occur in extremely damp and moist conditions, whereas dry rot can take hold in much drier conditions (although some moisture is needed to activate the spores).
Wet rot and dry rot both consume the cellulose in timbers, which in turn causes woodwork in your home to decay and deteriorate if left unchecked. Wet rot largely remains static, whereas dry rot can quickly spread through a home.
Knowing how to identify the initial signs of rot can help you to stop any decay before the fungal spores have a chance to spread through your home. The most common signs of wet rot in the home include:
- Discoloured timbers (either dark brown or white stains)
- Damp patches
- Damp, musty or mushroomy smells
- Visible fungus
- Visible damage or decay to timbers and woodwork
Telling the difference between different types of rot can be difficult, as both wet and dry rot have similar telltale signs and will require slightly different treatments. For this reason, we recommend asking a professional for advice before having any treatments carried out.
Will Vinegar Stop Wood Rot?
It can be tempting to look for a quick fix when you’re Googling answers to the question, ‘what is wet rot in wood?’ But it’s important to make sure the fix you’re applying is going to be the best solution.
One popular remedy for wood rot is vinegar because vinegar’s acidity has the ability to act as a fungicide that kills off fungal spores. Vinegar can stop fungal spores from spreading, allowing you to contain the wood rot and stop it from causing further damage, but it’s not the only treatment that can or needs to be applied.
Does Bleach Kill Wet Rot?
Like vinegar, another popular remedy for wet rot is bleach. It’s likely that you’ll have bleach in the home, and a bleach solution can prevent wet rot from spreading further. Like vinegar, bleach works as a fungicide and it kills the spores and therefore contains the spread of the rot.
Using bleach or vinegar may be a short-term fix, but it’s important to ask for expert advice. The extent of the wood rot may not be easily identifiable, and it may be difficult for you to find the source of dampness or rot that’s causing it to spread through the home.
What to Put on Wood Rot to Prevent Rotting?
Prevention is always preferable to treating wood rot. Treatments can be disruptive and costly if the rot has taken hold and is well established, and it’s much more effective to keep your timbers rot free, rather than waiting for problems to arise before applying treatments.
The best way to prevent wood rot is to have timbers coated in long-lasting chemical fungicides. These not only kill any existing spores but prevent them from being able to establish themselves in the wood. A damp and timber survey can help to identify where these need to be applied, and if any rot might already exist.
Fungicides are effective when the rot is on the surface, but if wet rot has already eaten into timbers, they will need to be replaced entirely. The new timbers then need to be coated in fungicides to stop the problem from returning.
How Much Does It Cost to Fix Rot?
The cost to fix rot varies from one home to another. Costs largely depend on the type of rot that’s affecting your home, how far it has spread, and how much damage has been caused. If rot has spread throughout the home causing damage along the way, this will cost more to fix than isolated incidents of rot in one or two rooms.
If the rot has begun destroying important structural timbers, then costs can add up. Damaged timbers need to be removed and replaced, and this can involve lots of disruptive work. As mentioned, the most cost-effective way to treat rot is to prevent it. Ensure timbers are treated with fungicides, keep an eye out for those initial signs of rot, and always act quickly to remove any types of rot before they can cause damage.
Contact Danford, Brewer & Ives for More Information About Wet Rot in Wood
Learning more about what is wet rot in wood is an excellent way to help you identify the first signs of rot in your home. Due to the serious nature of wet rot, we always recommend calling in a professional to identify the cause of rot and to advise on the best treatments for your property.
For more information and to learn more about ‘what is wet rot in wood?’ please contact our friendly team on 01765 804050 or fill in our online contact form. Our experienced specialists will be on hand, ready to offer expert advice tailored to your needs.

How Do You Waterproof External Brickwork?
External brick wall waterproofing is essential if you want to keep your home dry, no matter how bad the weather is outside.
External brickwork is the first line of defence against moisture. If there isn’t effective waterproofing, then your property can quickly succumb to serious problems such as rising damp or penetrating damp.
It’s important to ensure that all external brickwork can repel moisture, and there are several methods of brick wall waterproofing that homeowners can utilise. If you’re wondering how to waterproof your brickwork, the experts at Danford, Brewer & Ives are here to explain everything you need to know.
Isolate the Cause of Any Leaks or Damp
If you’re seeing signs of damp either inside or outside your home, it’s likely your brickwork has lost its protective waterproof layer. However, there can be several reasons as to why this waterproofing has failed, so it’s important to isolate the cause of any dampness before attempting to fix it.
Modern properties are built with brick wall waterproofing as standard, but depending on the method used, this waterproofing can deteriorate over time. The older your home, the more likely this is to have happened.
Bricks may begin to crack, gaps may form in the mortar, or cavity wall ties might rust or break, weakening the structure of a wall and allowing water to penetrate. There may be problems with excess groundwater, your damp proof course may have broken, and much more.
We recommend calling in a damp proofing specialist to identify the cause of any leaks, damp or moisture. They’ll be able to offer expert advice and suggest the most effective form of brick wall waterproofing for your property.
Ensure External Brickwork Is Sealed
The most basic fix when waterproofing external walls is to ensure the brickwork has been properly sealed. Even if it has been sealed, this waterproofing may have deteriorated and may need renewing.
A damp proof specialist can suggest the most effective forms of sealant, because there are many different creams and waterproofing agents that can be applied to the outside of a home. The best quality products will provide an effective barrier against moisture for many decades.
You’ll also need to make sure that any broken masonry, crumbling mortar or rusted cavity wall ties have been removed and replaced. This helps to avoid further gaps forming in the wall, thereby keeping the external brickwork fully sealed.
Install a Damp Proof Course
External walls need to be fitted with a damp proof course to repel moisture that might otherwise cause damp problems. A damp proof course is primarily designed to stop rising damp from working its way into a brick wall and then spreading throughout the home.
Older homes may not have an existing damp proof course fitted, in which case one needs to be installed. Over time, a damp proof course can shift position, in which case it would need to be repaired. A chemical damp proof course, which can be injected directly into the masonry, is the most effective option for homeowners.
Have ‘Tanking’ Carried Out on External Brickwork
If your damp proof course is lower than the ground level, you may find that water seeps into the home laterally (this is a form of penetrating damp). If this happens, then you can have a process carried out called ‘tanking’.
The idea of tanking is to completely seal and waterproof a wall below ground level, in such a way that you create an impenetrable, tank-like barrier. This is often achieved by stripping the wall right back to the masonry so the bricks are exposed, before rendering the exposed brick with a waterproofing agent. The brickwork can then be lined and plastered to create an effective waterproof barrier.
Tanking is commonly used to seal areas of brickwork that are below ground, such as basements. Because of the pressure caused by the ground above, these areas of brickwork are very susceptible to leaks, a problem which tanking aims to stop.
Contact Danford, Brewer & Ives for More Information About Brick Wall Waterproofing
Brick wall waterproofing is essential if you want to keep your home dry and damp free all through the year. With so many different methods of brick wall waterproofing available, we recommend consulting a damp proofing specialist for expert advice.
For more information on brick wall waterproofing, please contact our friendly team on 01765 804050 or fill in our online contact form. Our experienced specialists will be on hand, ready to offer expert advice tailored to your needs or to arrange a thorough survey of your home.

Is Solid Wall Insulation Worth It?
Is solid wall insulation worth it? With ever-higher expenses and the rising cost of living in the UK, that’s a question we hear frequently at Danford, Brewer & Ives. People are rightly worried about spending more money on things they are unsure of, particularly if there’s a large upfront cost involved.
But installing solid wall insulation is an excellent way for you to save money in the long run. Without adequate insulation, it’s estimated that houses can lose up to 50 per cent of their heat through the walls – and that translates into a lot of wasted money spent on unnecessarily high electric or gas bills.
Solid wall insulation can help to keep your house toasty and warm in winter, you’ll save energy, save money and help the environment. If you’re interested in having solid wall insulation installed, here’s our guide to why it’s worth it.
What Is Solid Wall Insulation?
Modern homes are routinely built with cavity walls, a simple system that allows a building to be thoroughly insulated. A cavity space between the inner and outer wall is filled with insulating material such as foam, and this traps warm air inside the home rather than allowing it to escape.
However, older homes dating back to the 1920s or earlier were constructed without cavity walls. Instead, they were built with what’s called a solid wall. These solid brick or stone walls are incredibly poor insulators, and they result in unnecessarily large quantities of energy being lost, especially in winter. This in turn results in the homeowner paying unnecessarily high energy bills to keep their home heated.
There is a solution, however. Installing solid wall insulation allows a homeowner to create a cavity space that can be filled with insulation. It’s most commonly installed inside the home, where a second layer of wall can be added to the existing solid wall, before being filled in with foam or other effective insulating materials.
What Are the Benefits of Solid Wall Insulation?
Upfront costs and disruption to your home can be off-putting for property owners, but in the long run, we firmly believe that solid wall insulation is incredibly beneficial.
Let’s take a look at the benefits of installing solid wall insulation:
- Keep your home warm: solid wall insulation helps you to keep your home warm in winter, as heat energy is kept inside rather than being lost through the walls.
- Save energy: keeping heat inside ensures you save energy, as your thermostat can be kept constant without expending further energy.
- Save money: saving energy results in direct savings on your energy bill, helping you to save money over time. With ever-higher energy prices, this is more important than ever.
- Help the environment: with dwindling resources, saving energy allows us to create a more sustainable planet for future generations.
How Much Does Solid Wall Insulation Cost?
Homeowners shouldn’t be deterred by the cost of installing solid wall insulation. Prices vary from one home to the next, but the most cost-effective and least disruptive option is to have internal wall insulation added to a property.
You should always contact a professional for a full survey and accurate quote, but you can expect prices to vary depending on the following:
- The size of the area that needs to be insulated
- The amount of work needed to insulate the area
- The materials used
- Extra work that also needs carrying out (such as rewiring or redecorating)
Costs can range from a few hundred pounds for a small section of wall to be insulated, up to a few thousand for an entire home to be fitted with internal wall insulation. Despite these upfront costs, you will save money on your energy bills, allowing you to recoup the expenditure and eventually save money.
Contact Danford, Brewer & Ives to Find Out More About Solid Wall Insulation
So is solid wall insulation worth it? Here at Danford, Brewer & Ives, we say yes. Solid wall insulation can save you money in the long run on your energy bills while helping to keep your home warmer than ever before in winter. Don’t forget, too, that installing solid wall insulation in your property helps you to play your part for the environment.
For more information and advice on solid wall insulation, please contact our friendly team on 01765 804050 or fill in our online contact form. Our experienced specialists will be on hand, ready to offer expert advice tailored to your needs or to arrange a thorough survey of your home.
How to Install Internal Wall Insulation
If your home has solid stone or brick walls, then you might be wondering how to install internal wall insulation. Solid stone or brick walls are notoriously bad insulators, and it’s estimated that as much as 50 per cent of a building’s heat can be lost through the walls without effective insulation.
Having internal solid wall insulation installed can help your home to conserve heat, keeping your house warm during winter while lowering your energy bills and helping the environment.
If you’re interested in learning how internal solid wall insulation can be installed in your home, the experts at Danford, Brewer & Ives are here to explain.
What Is Internal Wall Insulation?
Internal wall insulation is a type of insulation installed on the interior walls of a building. The main goal of internal wall insulation is to provide an effective insulating barrier that stops heat inside the building from escaping.
Modern homes are commonly built with internal wall insulation as standard, as they’re constructed with cavity walls that create an insulating barrier. However, older homes – particularly buildings dating back to the 1920s and earlier – were often built with only a single, solid wall.
A building with a solid brick or stone wall is going to be incredibly poor at insulating, as heat is easily lost when cold pockets form in the masonry. Having internal solid wall insulation installed is the best way to modernise these older homes, to keep them warm, to save energy and to lower bills.
There are several ways this can be achieved, but the most popular form of solid wall insulation is to have a second layer of wall installed on the inside of the home against the solid brick or stone. This second layer essentially creates a cavity space, which can be filled with insulating materials.
How Do I Install Internal Wall Insulation?
There are different methods of internal solid wall insulation, and the best method depends on a number of factors. This includes the age of your home, the stability of the existing walls, the internal space available, and the budget you have for materials.
For this reason, we always recommend speaking to a professional, as installing internal solid wall insulation is a large and often complex project to undertake. For the majority of older homes, the best option will be to add a second layer of wall, usually constructed from materials such as plyboard or chipboard. This space between the solid wall and the newly added layer of the internal wall needs to be filled with insulating materials; again, the materials can vary. More often than not, foam is the insulator of choice.
In order for the insulation to work, it needs to be installed to a depth of at least 60mm. This is the minimum depth we recommend and, if possible, the solid wall insulation should be installed to create an insulating barrier that’s 100mm in thickness.
Of course, the thicker the internal wall is, the more effective it will be at insulating, but you also need to consider that thicker walls are more costly and take up more space inside the home.
Do I Need a Professional to Install Internal Solid Wall Insulation?
Installing internal solid wall insulation is a large project that requires skill and expertise. A professional can help to highlight the most effective areas where insulation can be installed, allowing your home to be better insulated while saving you money by avoiding unnecessary work on ineffective areas of the property.
Because this can be a disruptive job, professionals also ensure that the work is done smoothly, quickly and to a high standard. There are multiple insulation options that can be considered by homeowners looking to better insulate their property. For example, a professional may suggest that traditional solid wall insulation could be combined with damp proofing work to create the best possible barrier against both moisture and heat loss.
Contact Danford, Brewer & Ives to Find Out More About Internal Solid Wall Insulation
Installing internal solid wall insulation can help you to keep your home warm in winter, save money on energy costs and protect the environment. Due to the complexity of installation and the different options available to homeowners, we always recommend having internal solid wall insulation work carried out by a professional.
For more information and advice on internal solid wall insulation, please contact our friendly team on 01765 804050 or fill in our online contact form. Our experienced specialists will be on hand, ready to offer expert advice tailored to your needs or to arrange a thorough survey of your home.